Tip of the Month! Editing Photos in PowerPoint
How to resize, crop and add contrast to photos for your business presentations.
Nobody wants to use multiple tools to complete a task they feel should be simple.
It doesn’t matter whether that task is vacuuming the house, cooking dinner, or creating a PowerPoint presentation.
We can’t help you with your household chores or cooking a meal that every butt at the dining room table will enjoy, but we can help you learn a new PowerPoint trick to make your life easier.
If you’ve ever started down the path toward a completed, beautiful PowerPoint presentation for your business only to be delayed by the realization that the photo you want doesn’t look quite right in its spot, then these PowerPoint tips are for you!
Did you know you can resize and crop your photos without leaving the Microsoft PowerPoint application window? Yep, we wouldn’t lie to you.
We’re going to have a jargon-free PowerPoint mini-lesson — right here, right now. It’s going to be great (i.e. simple and easy).
How to resize photos in PowerPoint.
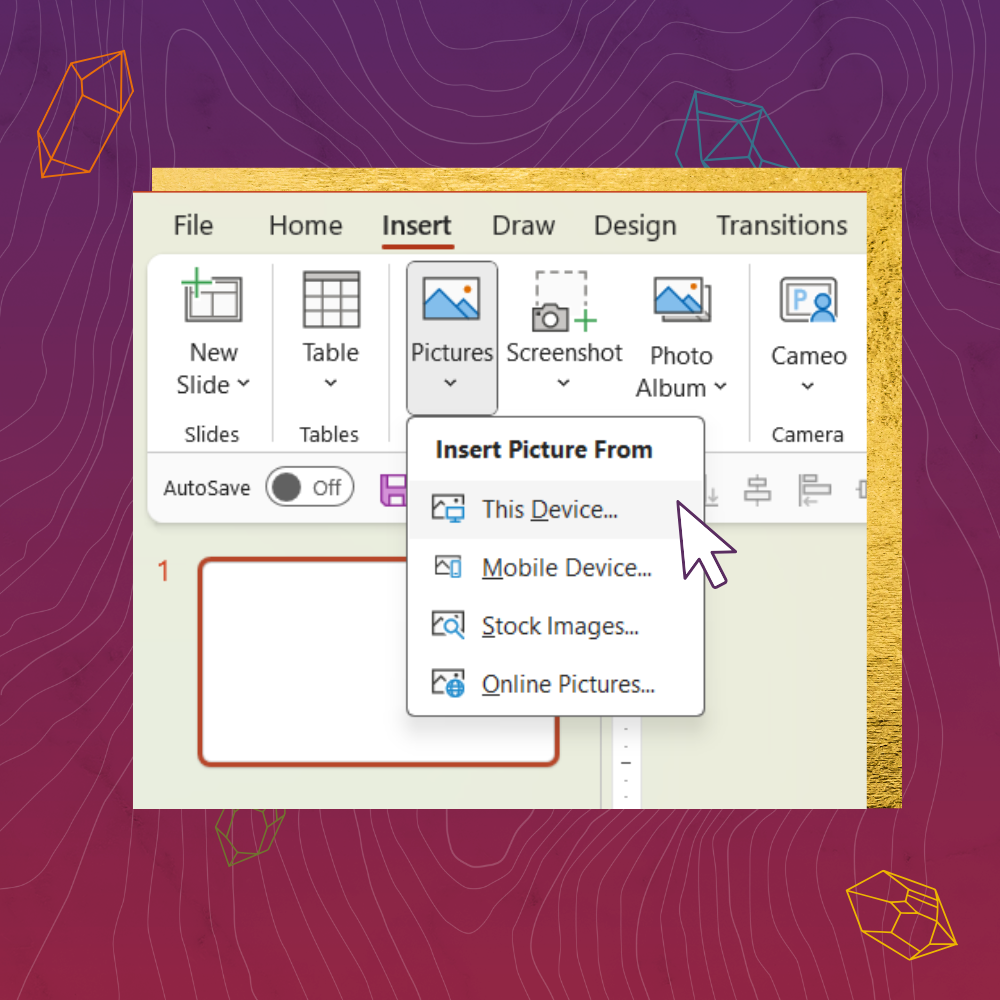
1. Choose the photo you want to add to your PowerPoint slide.
(Insert > Pictures > This device > Click to open and insert image)

2. Once the image is inserted into the slide, click the image to find the tabs on the corners and edges of the photo.

3. Drag the tabs to make the image larger or smaller depending on your design needs.

Now that you understand how to resize images in PowerPoint, you may find yourself wanting to eliminate some unnecessary space.
(Examples: too much blank space, an ugly ceiling you’d rather not steal the show, etc.)
How to crop photos in PowerPoint.

1. Click the image you would like to crop.
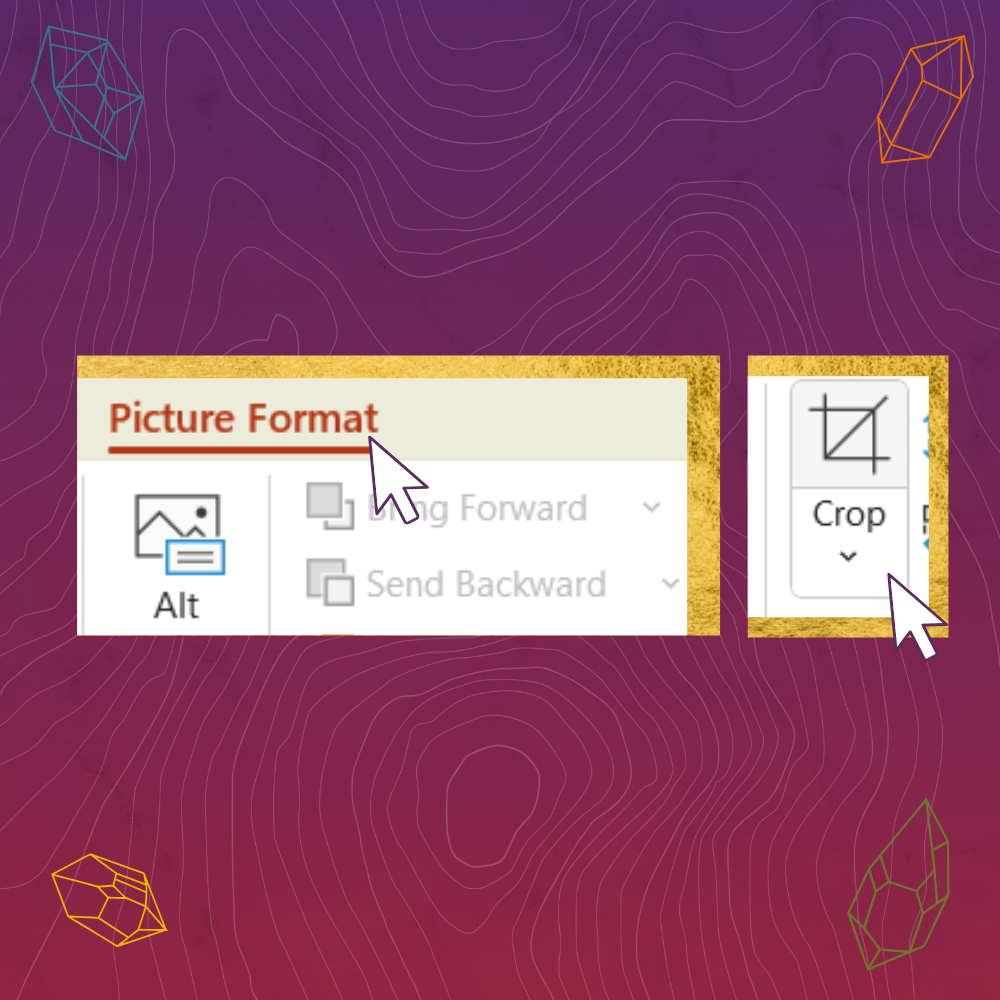
2. Click “Picture Format” in the navigational menu, then locate the cropping section.
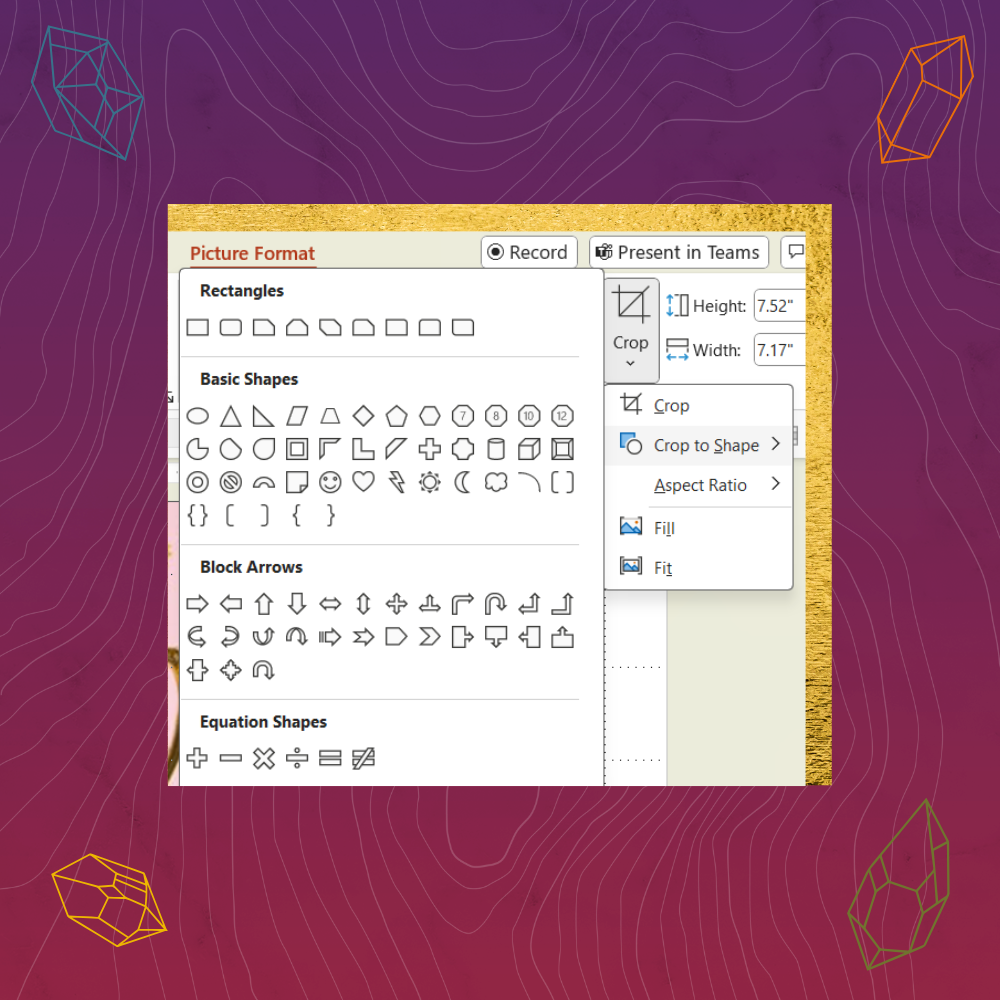
3. Define the shape height and width you’d like your photo to adhere to OR click the down arrow under the word “Crop” to open manual cropping, crop-by-shape, and aspect ratio* tools.

4. If you choose to manually crop your image, you can use the black handles on the corners and edges to adjust to crop any unwanted items, space, or distractions from your photo.

Smart cropping helps you pair photos with the text you’ll use as a reference or illustration during your presentation.
In the same way, attention to the brightness level and contrast of your images will make your photos pop and keep your slides vibrant throughout your PowerPoint presentation.
How to add contrast to images in PowerPoint.
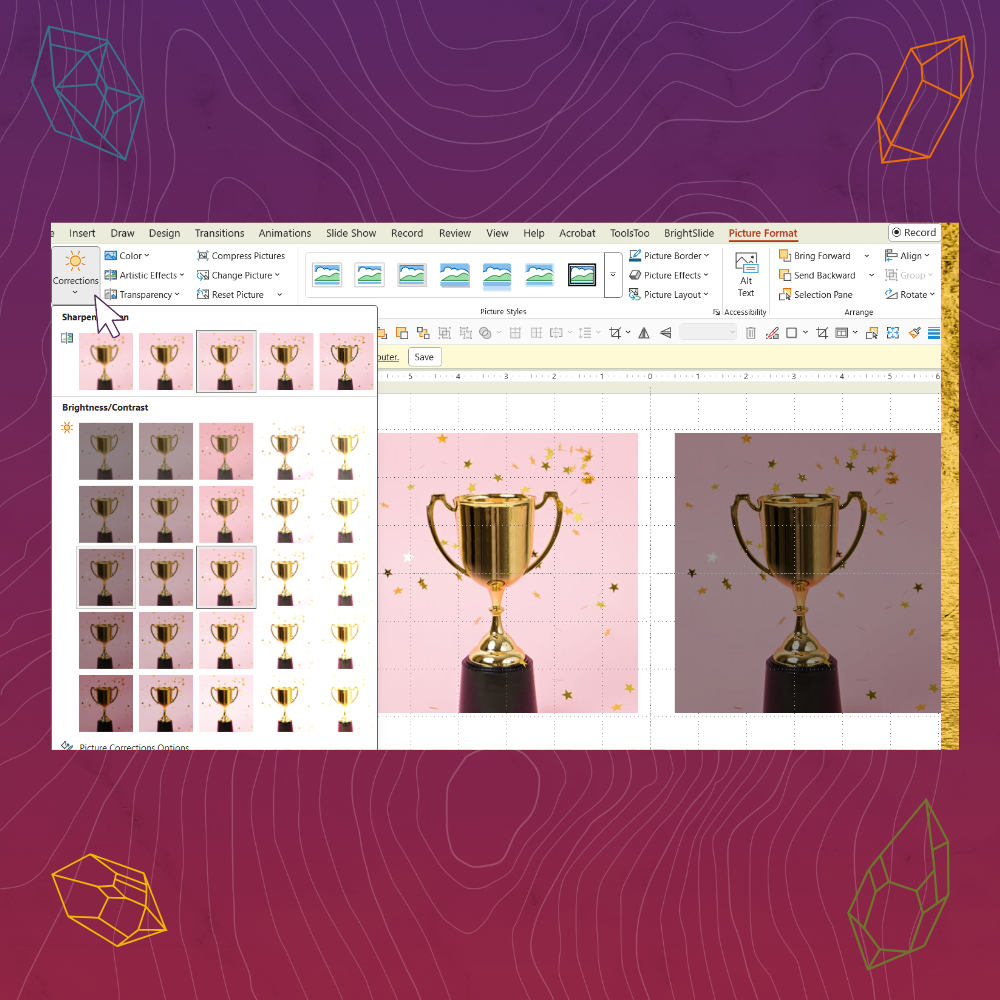
1. Under the picture format section, click the “corrections” button, which has a sun and down arrow on it.
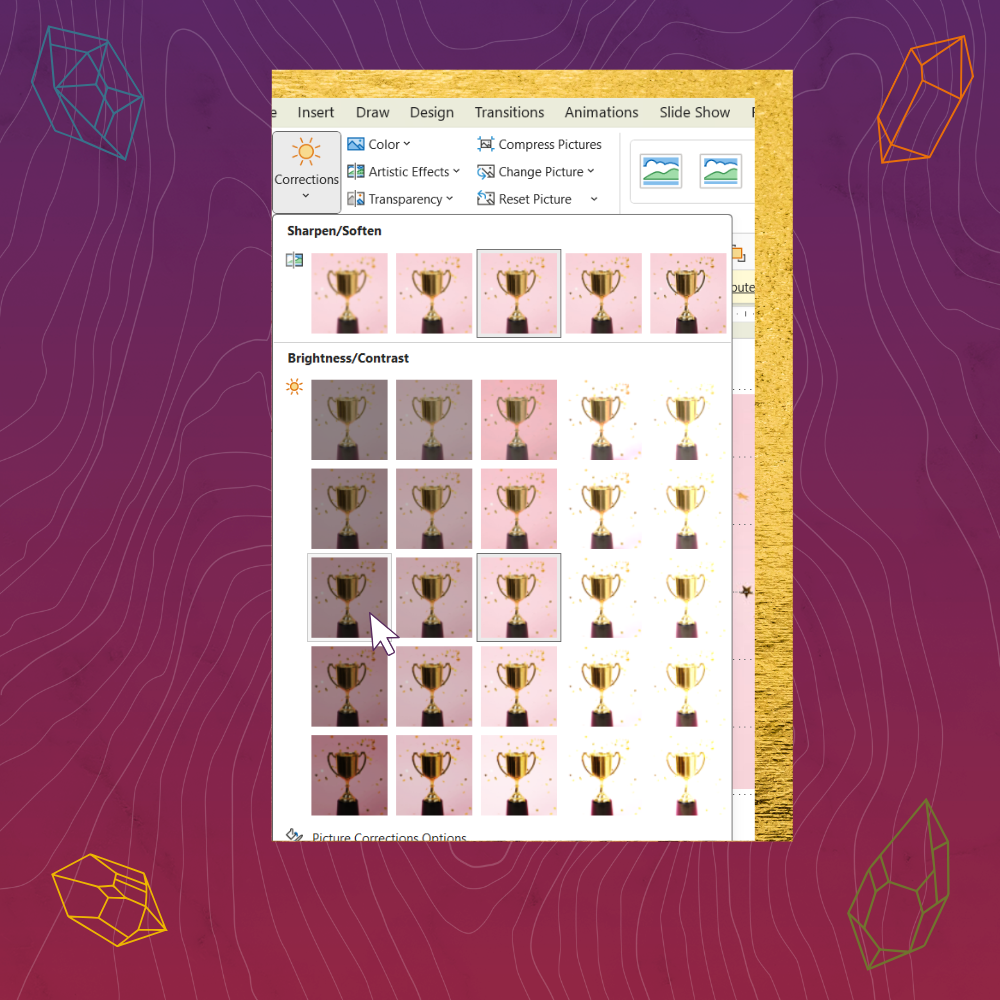
2. Choose a brightness and contrast level that fits your branding, style, and purposes for your presentation.

3. Take note of the brightness and contrast percentages you’ve chosen for this image. You’ll want to edit the photos in your slides consistently throughout your entire presentation.

If you found this information helpful, follow us on Instagram to make sure you never miss a powerful PowerPoint tip!
For further enjoyment.
